Introduction
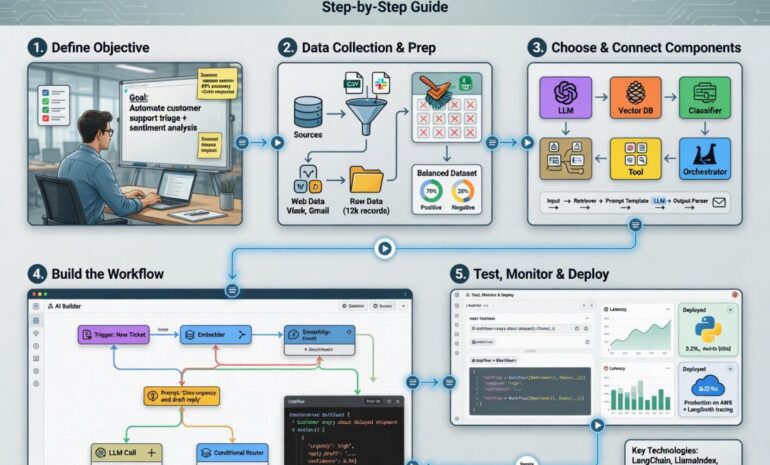
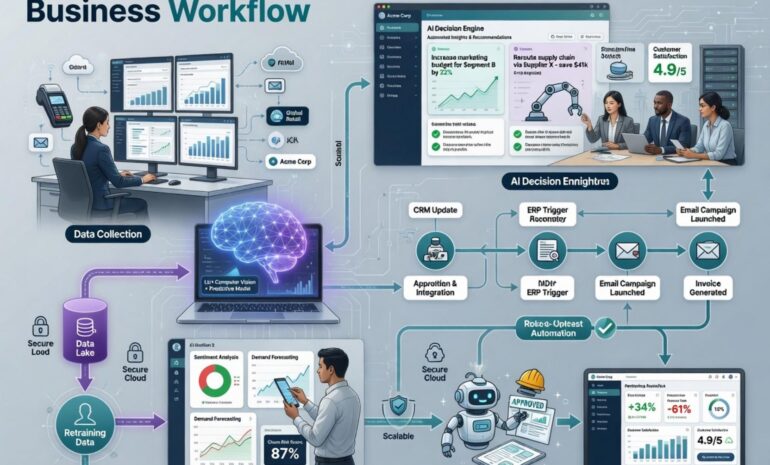
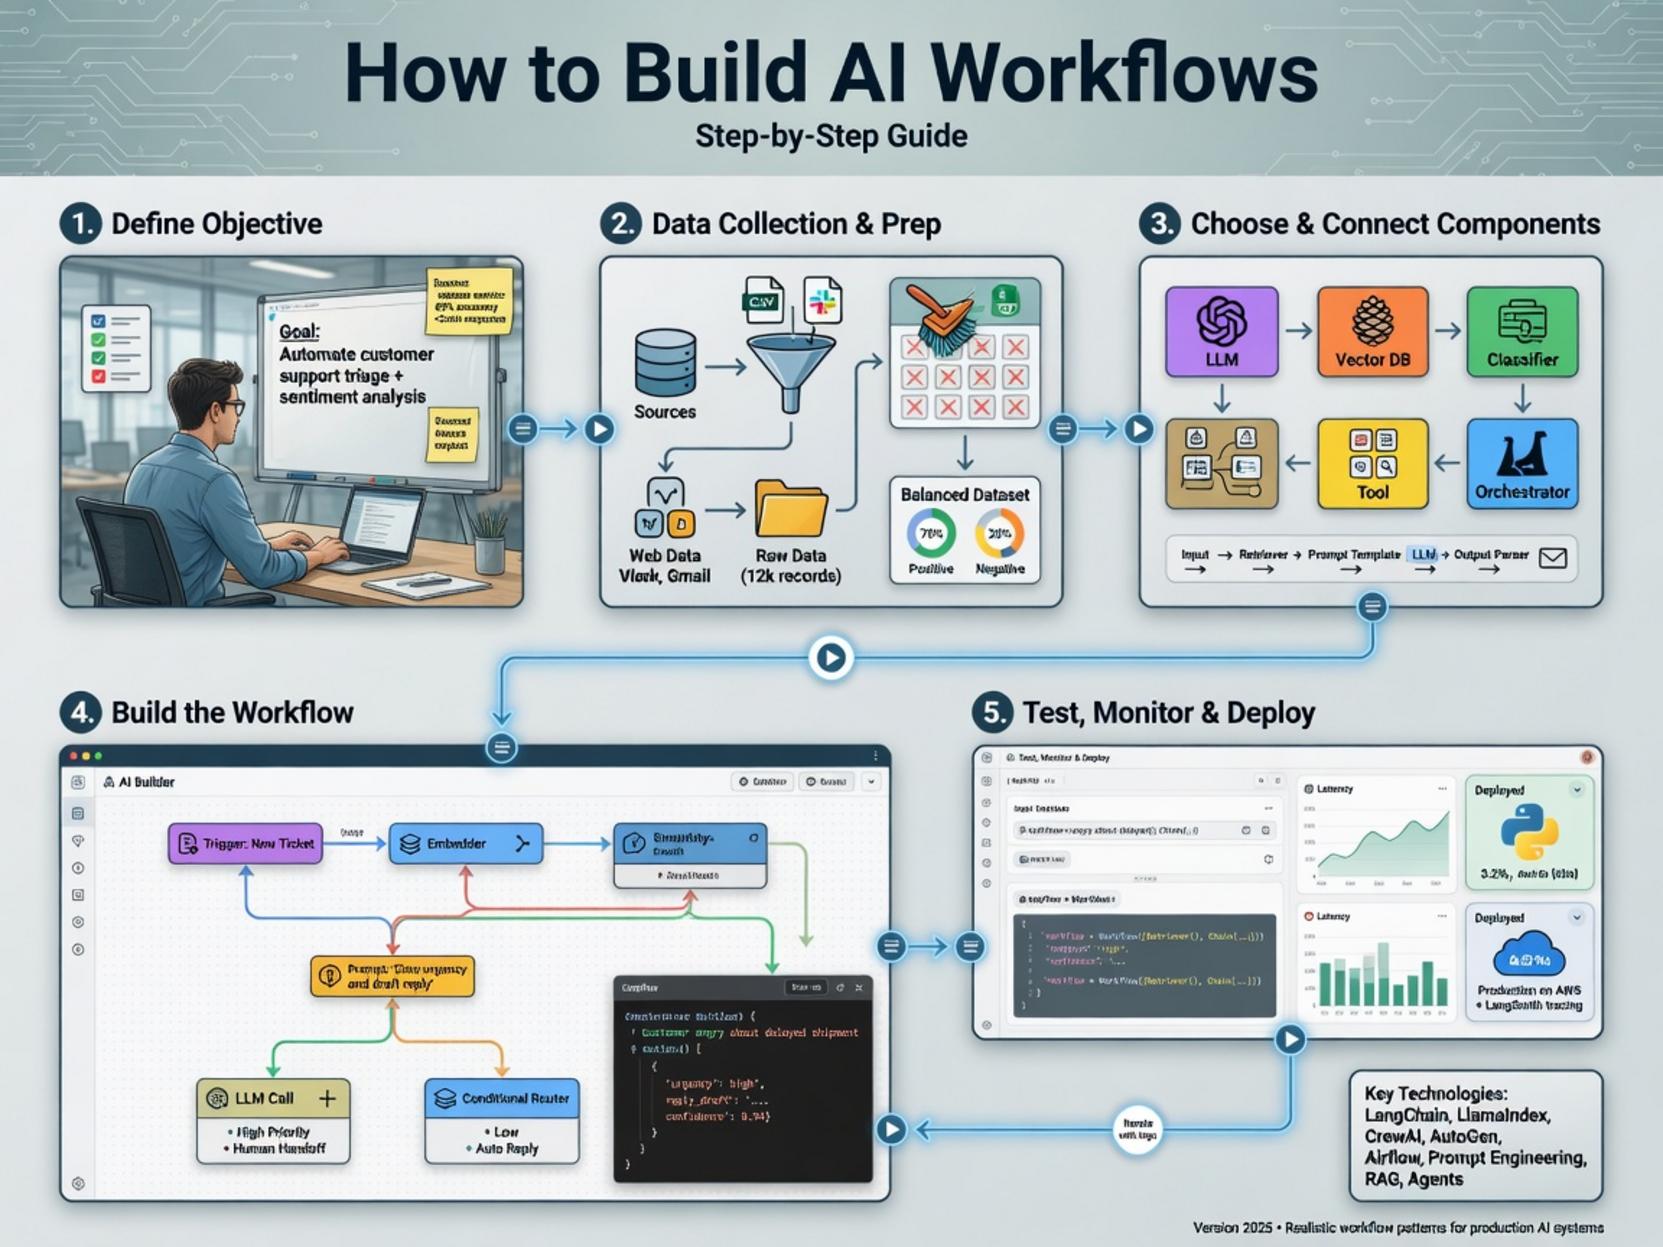
In today’s automation‑first world, AI workflows have become the backbone of smart business processes, enabling everything from predictive analytics to real‑time content generation. If you’re looking to harness the power of artificial intelligence without writing a single line of code, the leading low‑code platform n8n offers a seamless path. This post will walk you through a complete n8n tutorial, AI integration guide, step by step AI setup so you can start building robust AI workflows in minutes. By the end, you’ll understand why these two concepts—AI workflows and the n8n tutorial, AI integration guide, step by step AI setup—are essential for scaling automation in any organization.
Step‑By‑Step Instructions
1. Create your n8n account – Sign up at the n8n cloud or self‑host the open‑source version. Once logged in, click New Workflow to open the visual canvas.
2. Add the AI node – Navigate to the node library, search for “Advanced AI,” and drag the node onto the canvas. This is the core component of every AI workflow you’ll build.
3. Configure the AI model – Click the node, then open the settings panel. Choose the model (e.g., GPT‑4, Claude, or an open‑source LLM) and paste your API key. For a detailed walkthrough, refer to the official n8n tutorial, AI integration guide, step by step AI setup.
4. Define the trigger – Add a trigger node such as Webhook, Cron, or Email to start the workflow. Connect it to the AI node; this linkage determines when data is sent for inference.
5. Map inputs and outputs – Use the Set node to format incoming data (e.g., customer query, image URL). Then, map the AI node’s response to the next step—perhaps a Slack message, a Google Sheet entry, or an automated PDF report.
6. Test and iterate – Click Execute Workflow to run a live test. Observe the output panel and adjust the prompt, temperature, or max tokens until the response meets your quality standards.
7. Deploy – Once satisfied, activate the workflow with the toggle switch. The AI workflows you’ve just built will now run automatically, delivering intelligent results on demand.
Tips for Optimizing Your AI Workflows
– Prompt engineering: The clearer the prompt, the better the AI’s answer. Use bullet points, explicit instructions, and sample outputs.
– Rate‑limit handling: Insert a Wait node or use the built‑in retry logic to avoid hitting API quotas during peak loads.
– Error monitoring: Attach an Error Trigger node to capture failures and push alerts to a dashboard or email.
– Version control: Export your workflow JSON after each major change. This practice lets you roll back quickly if an update breaks the AI workflows.
Alternative Methods
While n8n provides a user‑friendly visual interface, other platforms can achieve similar outcomes:
| Platform | Strength | When to Choose Over n8n |
|———-|———-|————————|
| Zapier | Massive app ecosystem, no self‑hosting | Simple one‑off automations with limited customization |
| Make (Integromat) | Advanced data manipulation, built‑in AI modules | Complex data pipelines that require granular branching |
| Apache Airflow | Enterprise‑grade scheduling, Python‑first | Heavy‑weight, code‑driven pipelines for data engineering teams |
If you prefer a code‑first approach, you can still reference the same AI node concepts by using the n8n CLI or the REST API, which mirrors the visual configuration you saw in the n8n tutorial, AI integration guide, step by step AI setup.
Conclusion
Building intelligent AI workflows doesn’t have to be a daunting task. By following this concise n8n tutorial, AI integration guide, step by step AI setup, you’ve learned how to create, test, and deploy AI‑powered automations that scale with your business needs. Whether you’re automating customer support, generating marketing copy, or enriching data pipelines, the combination of n8n’s visual builder and powerful AI nodes gives you a future‑ready solution. Ready to dive deeper? Check out the full guide at How to build AI workflows and start turning ideas into actionable, data‑driven processes today.